
So you have your Node.js app built and working in your local environment and now you want to deploy it to AWS. In this simple and straight forward tutorial, we will provide a step by step guide on deploying your app to AWS. NodeChef will install Node.js on your server and all other packages and configure it to run without any hassle. You can later use our 1-click SSL feature to secure your app and also set your custom domain.
Deploying and managing Node.js applications on AWS can be quite complex depending on your needs and the skill level of you and your team. If you want a robust deployment that can quickly scale to meet demand when the application becomes popular also presents it's own set of challenges. On going security updates patching to ensure your Node.js application is not vulnerable to attacks as well as high availability demands to ensure your Node.js app is always on also compounds the challenges.
This is why NodeChef Platform-as-a-Service for AWS exists to take away the heavy lifting of deploying and managing Node.js to a compex cloud environment such as AWS so you and your team can solely focus on code and not servers.
We will go over the below steps to demonstrate how to host Node.js on AWS using NodeChef Platform-as-a-Service. A robust managed AWS cloud hosting platform for applications of all sizes and scope. You do not require any prior windows or linux server management expertise to successfully complete this tutorial. NodeChef takes care of everything so you can focus on your code.
- Create a NodeChef account and connect your EC2 Server
- Push your Node.js app to the EC2 Server
- We Install Node.js and other packages on your server and launch your Node.js app
- Conclusion
Steps to Deploy Node.js on your EC2 Server
Step 1: Create a NodeChef account and connect your EC2 server.
Sign up for a NodeChef account, confirm your email address and log into the dashboard. You can also quickly log in and skip the sign up if you have an account with Google, GitLab, GitHub or BitBucket.
On the dashboard, click private cloud → add new server. Before you can add your EC2 Server, you must ensure your server meets the below criteria. We advice you use a new EC2 Server which you are not already using. Of course you can still use the EC2 Server for other projects and not just the Node.js app.
Checklist:- Public Ipv4 address.
- A login user with sudo privilege.
- The private key or the password to be used to log into the server.
- Server runs Ubuntu OS (18.x, 20.x or later). NodeChef prefers 20.0.4 - focal. Ubuntu 16 is fine too although we do not recommend it.
- CPU architecture is X86_X64.
- Server has at least 15 GB storage.
- You must ensure inbound traffic to ports 22, 80, 443, and port range 3000 - 6000 are allowed. For a start, simply allow all TCP traffic on the security group of the EC2 server.
You can also integrate your AWS account with NodeChef and provision EC2 servers directly from the NodeChef dashboard. NodeChef ensures the checklist is met automatically. In this tutorial, we will provision the EC2 server on AWS and bring it to NodeChef.
Enter the details on the add server form and then click the add server button to add it to your NodeChef account. Adding a new server can take up to 10 minutes to set it up with all the runtime tools that will allow NodeChef to manage Node.js deployments to your server.

Once you click Add server, you can see the progress of the NodeChef runtime installation on your EC2 server as seen below:

Step 2: Push your Node.js app to the server.
Now that the server has been added to your NodeChef account, it's time to push the code to the EC2 Server. Before deploying your Node.js app, you have to make sure it is ready to run in an environment other than your local computer.
Open your package.json file and make sure there is a scripts.start attribute set in it. This attribute tells NodeChef which one of your .js files is the main entry point to your app. For example, if your app starts with an index.js file. Your package.json scripts section will have a start attribute with a value like as seen below:
"scripts": {
          "start": "node index.js"
}
We now have to make sure when our web app starts, it actually can accept connections from the internet. To do this, our application must bind to the right port address that will be available when the Node.js app starts and is running. We have provided an example on how to call the server.listen function to start the web server. Of course, how you start the web app in your project might be different but just make sure it is using the process.ENV.PORT environment variable.
server.listen({ port: process.env.PORT || 3000 }).then(({ url }) => {
  console.log("🚀 Server ready at ${url}")
});
If your Node.js app requires a database, we will demonstrate below how to create one on your EC2 server below. NodeChef supports MongoDB, MySQL and PostgreSQL. You can always reference the connection string to the database in your Node.js app by using the environment variable "DATABASE_URL". If you also want to set your own environment variables, you can review our documentation on environment variables here.
After the above steps, follow the below stops to initiate the deployment to the EC2 server.
- Setup a NodeChef application
Click on the deployments tab on the dashboard. under Deploy App. Specify a name for your app and select a container size. Select a database if required.

Under the hosting location, select the name of the project you used when adding the EC2 server under the host this application on my servers. This is very important

Click the launch cluster button to create the application on your EC2 server.
-
Push the code to the EC2 server
We provide three different ways for you to push your application to your server as explained below.
Push using GIT
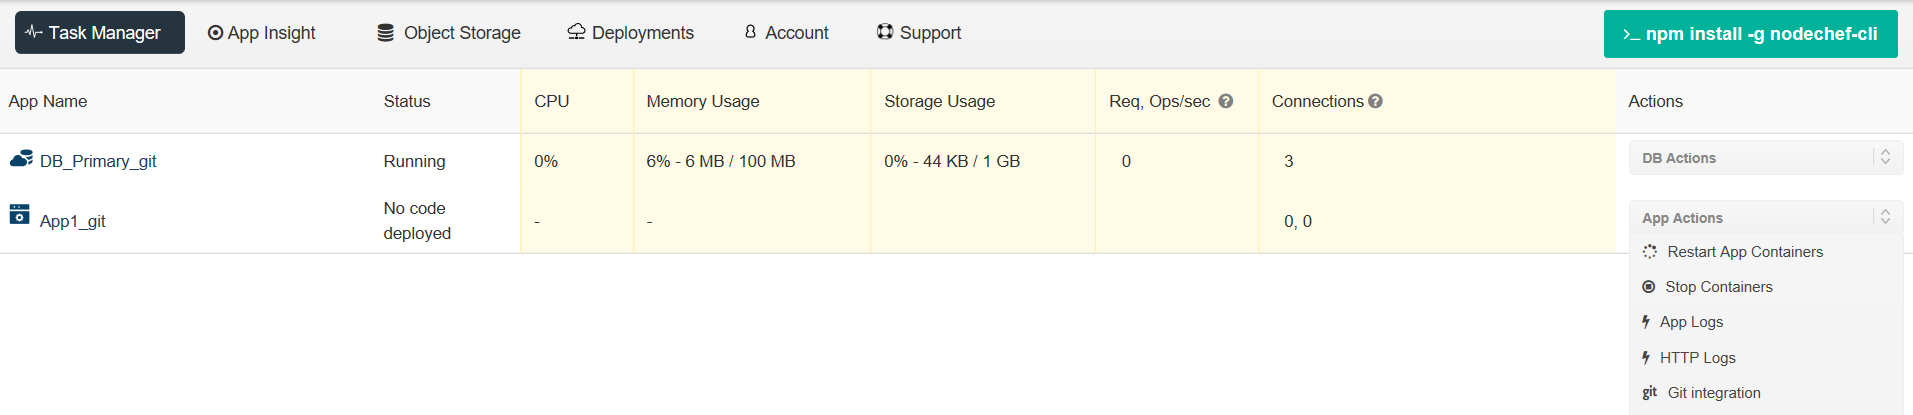
Click on the Task Manager → App Actions → Git integration to configure GitLab, GitHub or BitBucket integration.
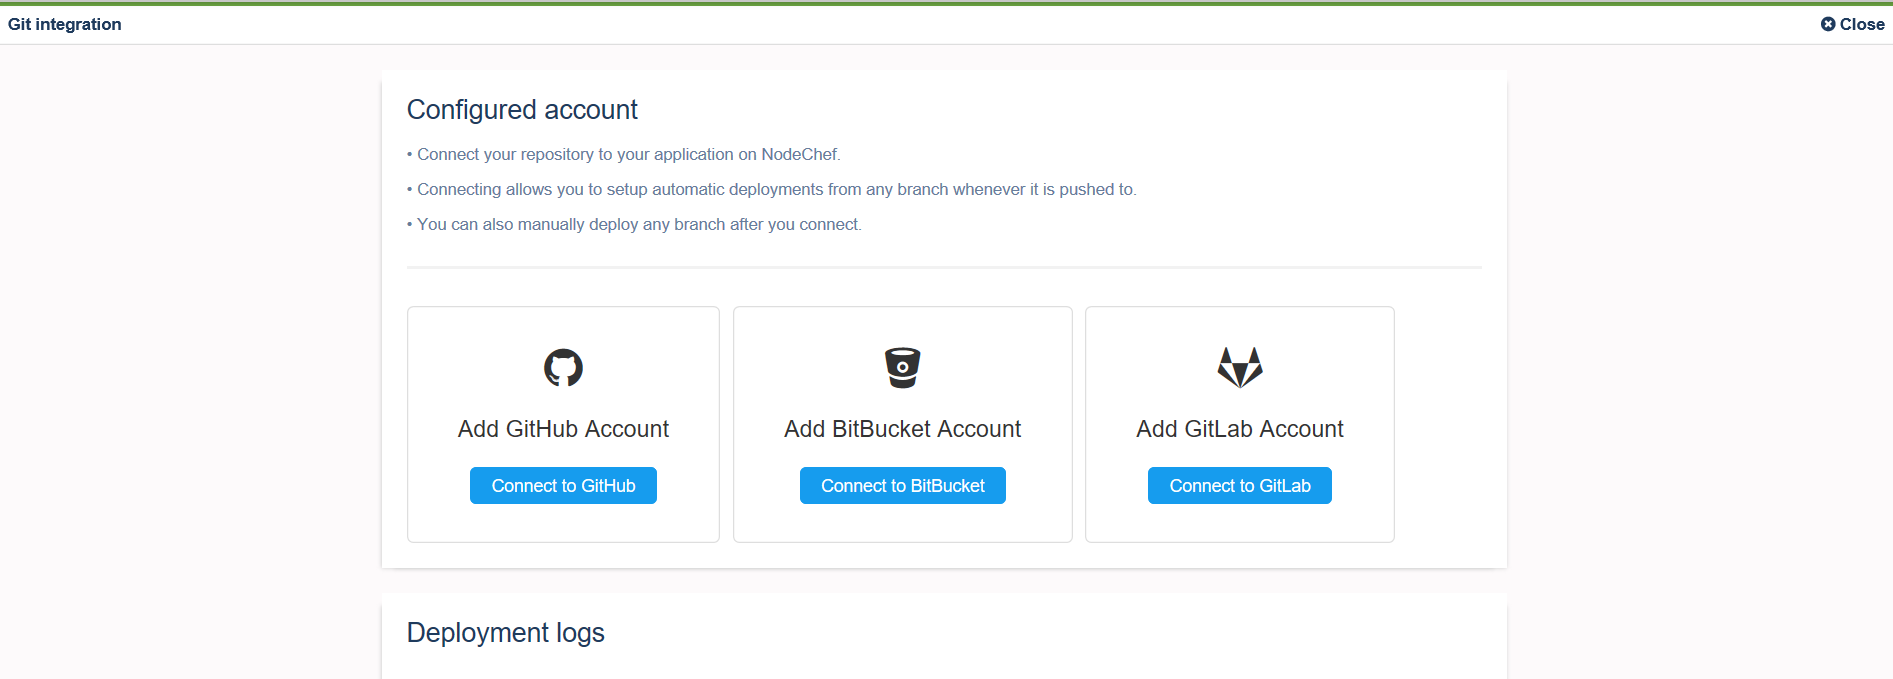
To configure GitLab integration, you have to authenticate with your Git repository. You only have to do this once per NodeChef account. Click “Connect to (repository)”, to start the authentication. If you signed up or logged in with GitHub, GitLab or BitBucket, the authorization step should be already complete without having to perform another authorization step.
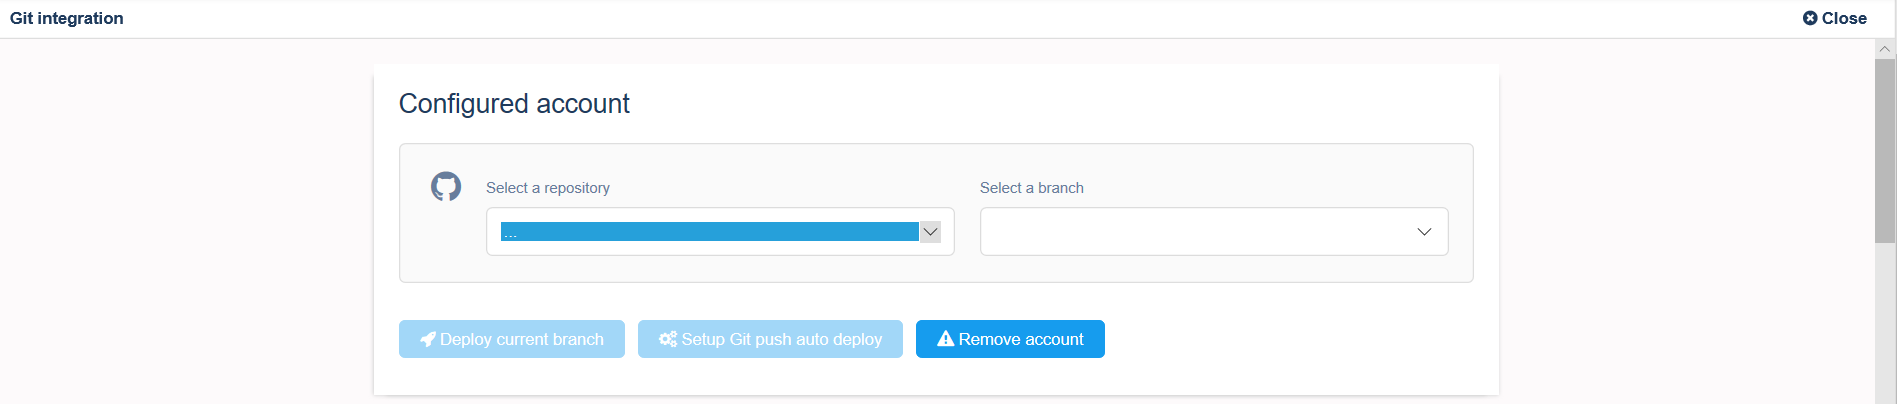
After you link your Account to a Git repo, you can selectively deploy from branches. You can also configure a specific branch to automatically deploy whenever you run git push from your terminal.
Push by uploading your project folder
You must first zip all the contents in your project folder or use a tar archive with gzip compression to bundle all the files in your project folder. You can then upload this bundle. Navigate to the task manager → App actions → Upload code. Select the runtime, and the archived folder to deploy and that is it. Do not include folders such as ".git" or "node_modules" as part of the zip package you will be uploading. These folder are unneccessary and slows down the upload.

Push using the NodeChef CLI
Install the NodeChef CLI from npm using the command as seen below:
npm install -g nodechef-cliGenerate a deployment token from the dashboard by navigating to the task manager → App actions → Deployment token

CD into your project folder and use the command as seen below to deploy.
nodechef deploy -i my_first_node_app -auth my_token # if you have environment variables, you can use the below command nodechef deploy -i my_first_node_app -e env.json -auth my_token
Step 3: We Install Node.js and other packages on your server and launch your Node.js app.
Once you initiate the deployment, NodeChef will analyze your project and install the right Node.js version and all other binaries and packages required for your app to run.
The installation should typically take less than 5 minutes. The installation is called the build phase on NodeChef. Once the installation completes, you can see your app by navigating to the Task manager → App actions → Browse.
Conclusion
Congrats. That should be it, see how easy it was. In less than 15 minutes, you have your Node.js app running on your EC2 Server. NodeChef simplifies the deployment of Node.js apps to AWS with our affordable and robust managed hosting offering.
Nothing as Easy as Deploying Node.js Apps on AWS
With NodeChef, you can have your Node.js apps up and running on managed cloud servers in just a few minutes.